Monday, December 28, 2009

Forgeworld Broadsides

Hey guys, long time no see! Hope the holidays are treating you well with plenty of tabletop carnage.

I thought I'd give an update now because...well, I haven't done one is so damn long!

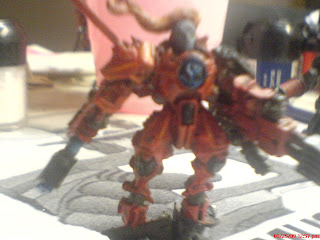
To start off with, good things happened over the x-mas, because I've picked up a few Broadside Battlesuits from Forgeworld! I've barely had a chance to get started on them, but once they're looking pretty I'll get some pics up!

Just letting you know I'm still around!


Apollo

Monday, October 5, 2009

Custom Etherial - Part 1

I am probably one of the last people who will ever tell you to use an Etherial in a game. They're very much a liability and I prefer to use the 50 points on something else that's actually useful for my strategies, like another Crisis Suit. These feelings and personal preferences aside, I can't help but like the models themselves. Unfortunately my willingness to spend money on one of these guys is very little, and therefore I decided to scratchbuild one out of greenstuff and spare parts!

Here's the little bugger so far:

500 Points of Tau

This is the bare-bones army. Designed for a quick game, hour or two, tops.

HQ

Commander 100pts
Shas'El x1
Flamer, Burst Cannon
Shield Generator
Stim Injector
Multi-Tracker
Blacksun Filter

TROOPS

Fire Warriors 120pts
Shas'La x12
Pulse Rifle x12

Fire Warriors 120pts
Shas'La x12
Pulse Rifle x12


HEAVY SUPPORT


Hammerhead Gunship 160pts
Hammerhead x1
Railgun
Burst Cannon x2
Multi-Tracker

1000 Points of Tau

I've been thinking about this 1000 point army all week, looking for a nice happy balance to bring in to fight in a tournament. Here's what a week's worth of thinking has done for me. Let me know what you think: leave a comment!

HQ

Commander (1) 101pts
Shas'El (1)
Flamer, Fusion Blaster
Shield Generator
H/W Multi-Tracker
Stimulant Injector

ELITES

Crisis Battlesuit Team (3) 142 pts
Shas'Ui (1)
Flamer, Burst Cannon
Multi-Tracker
Shas'Ui (1)
Flamer, Missile Pod
Multi-Tracker
Shas'Ui (1)
Flamer, Plasma Rifle
Multi-Tracker

Stealthsuit Team (3) 92 pts
Shas'Ui (3)
Fusion Blasterx1
Burst Cannonx2

TROOPS

Fire Warrior Team (12) 120 pts
Shas'La (12)
Pulse Riflex12

Fire Warrior Team (12) 120 pts
Shas'La (12)
Pulse Riflex12

FAST ATTACK

Pirahna Light Skimmer (3) 80 pts
Pirahna (1)
Fusion Blaster
Sensor Spines
Targetting Array
Gun Drones (2)
T/L Pulse Carbinex2

Pathfinder Scout Team (10) 174 pts
Shas'La (7)
Pulse Carbinex6
Markerlightx6
Devilfish (1)
Burst Cannon
Sensor Spines
Gun Drones (2)
T/L Pulse Carbinex2

HEAVY SUPPORT

Hammerhead Gunship (1) 170 pts
Hammerhead (1)
Rail Gun
Burst cannonx2
Sensor Spines
Multi-Tracker

Hey, Guess What?

Well, turns out my ride to the tournament wasn't able to make it, so no tournament. :(

However, that doesn't mean I can't show off a bunch of stuff I've been working on! Sorry for the hiatus folks, Swords of the Vior'la is BACK!


Phase in, phase out, phase in, phase out, phase in, phase out, phase in, phase out, phase in, phase out, phase in, phase out, phase in, phase out, phase in, phase out...


The OTHER Commander. I'll probably unleash her next game against the Guard.


Check it out! The Pathfinder Shas'Ui is finished and lookin' good!


A couple Kroot that I painted awhile ago and forgot to post.


Advertising in the 41st Century.

Friday, September 25, 2009

Upcoming Tournament, Sunday October 4th

Next Sunday I'll be participating in a doubles tournament with one of my friends who plays Guard. Each of us has 1000 pts, and as there will be a painting competition, I'll be viciously rushing to get those 1000 pts of Tau finished before then, so expect plenty of showcase updates between now and this time next week! I'll also be taking pictures of the tournament and posting some battle reports...unless I massively fail, then they'll only be one report >_>

It's workin' time!

Monday, September 21, 2009

Tactica: Gun Drones and Vehicles

I was reading a recent battle report over on "The Tau of War" and it got me thinking about a very important aspect about the Tau army when it comes to annihalation missions.

Every Tau player has been there at some point. You waltz into a game with your friends and it comes up annihalation. Sure enough, you look and see Gun Drones all over the place. Tiny little units of free kill points....

Those Gun Drones could be the deciding factor of the game, and no one wants to see that happen! How do you get around this? There are a couple of ways to make sure you're secure in th number of kill points you offer up to your opponents.

First, and foremost, make sure you only ever have as many Devilfish as you need. True enough, you can purchase a Smart Missile System for the Fish for 20pts, but that adds up very quickly and depletes from your resources. Instead, keep your transports safe and in few numbers. I prefer to bring in a Pathfinder unit and use their Devilfish to swap between Pathfinders, Fire Warriors and Kroot moving across the table. For 80 points, you've got a transport for all your infantry, as long as you keep it safe. The 20 points for the SMS could be two more Fire Warriors, and you need all the fire power you can get in these missions.

Second, have your Pirahnas in formations. Yes, I know, having Pirahnas zoom across the table independantly is very nice and can help alot for contesting in objective games. However, you'll quickly find that in annihalation having each fragile speeder worth 2 kill points will lose you battles quickly. In squadrons, Pirahnas deploy their Gun Drones as a single unit, meaning the entire formation is worth only 2 kill points as opposed to 2 points for each Pirahna.

Thirdly, you have the Gun Drones, so use them. Gun Drones can be deployed and as you have them for free, it'd be a waste to not let them have fun. While your vehicles speed off to focus on another part of the battle, Gun Drones can hold down enemy units with pinning fire, supported by your Pathfinders' markerlights. A BS 2 they may have, but never discount the twin-linked effect (it may surprise you to know that BS 2 T/L is actually MORE accurate than normal BS 3). Gun Drones are surprisingly hardy, and can take as much punishment as Fire Warriors. Gun Drones can also guard your more important units, such as tanks and Crisis/Broadside Teams, giving them valuable cover saves against deadly heavy weapons. Gun Drones can also block assaults, which is good news for the Tau (it gives me great pain to say that at Init 4, Gun Drones are one of the fastest units in the Tau Empire in combat. Heck, I almost had a single Gun Drone take out a Carnifex in close combat because of this). Gun Drones often have a better chance of survival on their own. Instead of keeping them with a vehicle to make it 2 for 1 kill points, send the Drones off to support your other units. Remember that they have assault moves thanks to their jetpacks, which can allow them to duck from cover to cover, making them great for tagging with Stealth and Crisis Suits. Don't forget about pinning either: this can really annoy your opponent as he tries to advance on the battlefield while dealing with pesky drones. Pinning is a deadly--if not forgotten--weapon when used properly. Pinning nearby units keeps all your units alive, which is bonus points in annihalation games.

Finally, be aware of how you conduct the Tau's "disadvantage" in annihalation as it can rapidly become your advantage. Gun Drones are as much a weapon as they are a nuesance. They make great distractions, suppression firers and can STILL blast through Guard, Ork and 'Nid armour. Next time you fight in annihalation, surprise your enemy when they think those Gun Drones are going to be to their benefit.


Apollo out.

The Crisis Battlesuit: Tactica


The Crisis Battlesuit makes up the very heart of the Tau army, being the most mutable and deadly choice for any player to have as Elites. With an array of weaponry to choose from, 3+ armour save and jetpack movement in the assault phase, the Crisis suit should become an object of fear for your enemies.

THE WEAPON SYSTEMS

The standard Shas'Ui pilot has a choice of five weapon systems: the Flamer, the Burst Cannon, the Plasma Rifle, the Missile Pod and the Fusion Blaster. The varience between armament is extreme, and it comes down to personal taste in what you choose. Each design has a number of applications.

Anti-Infantry suits should always have Flamers. Burst Cannons are a good alternative, but also consider twin linked Flamers for rerolls on to-wound.

Anti-Vehicle units are good to arm with Fusion Blasters, supported by Missile Pods. For this time and this time alone, I will suggest for going without the Multi-Tracker in favour of the Targetting Array, as you have less shots than against infantry and will want all the hits you can get. Alternatively, you may wish to use Twin-Linked Fusion Blasters.

The method I prefer for Crisis Suits is the multi-purpose team. A 3-man squad, all armed with Flamers and Multi-Trackers, with one Burst Cannon, one Missile Pod and one Plasma Rifle. This set-up maximizes the number of shots for the entire unit, as well as creates seperate profiles amongst the unit, allowing you to distribute wounds. The unit is 142 points and I use it in almost every game.

THE SUPPORT SYSTEMS

Without a doubt, the single choice you have for basic suits is the Multi-Tracker. If your suits have two weapons, you will almost always want to have one of these to fire both weapons in the same turn. For Shas'Vres and up, a Shield Generator is an excellent choice, especially for bodyguards. A Shas'El or Shas'O should always be armed with a Shield Generator as they will be a prime target for your opponent.

THE WARGEAR

This section is open to Shas'Vres and up, and is extremely useful for command squads. He you can purchase a Multi-Tracker for the same cost as normal without taking up a hard point on your battlesuit. Other items of interest are the Iridium Armour for increased protection, the Failsafe Detonator and the Stimulant Injector.

MY CRISIS COMMANDER

A Shas'O or Shas'El makes a good choice in any situation. The BS 4 is not a bad penalty for the 25 points it frees up. I prefer the Shas'El.

My Commander is a Shas'El armed with a Cyclic Ion Blaster and Flamer. He carries a Shield Generator support system and has a Hard-Wired Multi-Tracker and Stimulant Injector for Wargear. The Flamer is often swapped for a Fusion Blaster to make him a multi-purpose unit.

CUNNING STRATEGIES

Remember that the safety of your Battlesuits is a priority. As 3-man teams, Crisis suits are fragile units that can be taken down by a few lucky shots. The best strategy is often the simplest, so use your assault move to duck and weave between cover. If cover does not exist, create it by moving tanks or Pirahnas into the open to block line of sight.

Knocking out enemy infantry with Flamers means getting close enough, leaving your suits vulnerable. I've found the best option with flamer units is to use Deep Strike. The risk pays off more often than not, placing your suits within arms reach of the entire unit. Flamers will make short work of Guard, Ork and Tyranid troops. Placement is key, making sure you drop your suits where they cannot simply be wiped out by other enemy units in the area.

For anti-vehicular units, such as those armed with fusion weapons, Deep Strike can also be the best option. A well-placed Deep Strike can get you inches away from a troublesome tank's rear hull, blowing it to pieces with a few shots. Again, be wary of where you Deep Strike. An alternate strategy is arming the suits with Missile Pods as well as Fusion, advancing upon the vehicles while pinning them down with missile fire. This strategy will not work on AV 14 vehicles, so be warry.


The Tau are a mobile army first and foremost, so remember to keep moving, and not to let your opponent catch you off guard. Tailor your Crisis teams to find what works with the rest of your army and watch as you bring down enemy unit after enemy unit.


Apollo out

Sunday, September 20, 2009

Hammerhead: Part 1

Things are finally starting to come together with the army, and that includes the vehicles. The first Hammerhead is nearing completion as most of the hull and engines are painted. The Railgun itself is missing only a few slight details, but almost the entirety of the tank is missing the glowing blue creavases. Hopefully I'll get some more done on this shortly and have more pictures to post.

Friday, September 18, 2009

Pathfinder Shas'Ui: Part 1

I decided the Pathfinder team leader deserved to look much more decent for his position, so I make a few cuts into plastic (and my right middle finger) and glued on a few new pieces. I'll be painting him up shortly, but here's a preview glimpse at his new look.

Thursday, September 17, 2009

Aftermath Online Campaign

As some of you might know, I've played alot of games with Akenseth over the summer, and we keep in contact with each other about going ons. Why am I going on about this?

Akenseth has revived his old online campaign: Aftermath. It's free of charge, and anyone can participate by sending in their battle reports.

Check it out over at pathoftheexodite.blogspot.com

Saturday, September 12, 2009

Showcase: Fire Warrior Shas'Ui

I started working on the Fire Warrior teams and thought I'd try to make the team leaders look special, even if I don't end up using the Shas'Ui upgrades all the time. Here's a look at the first team leader.


Friday, September 11, 2009

Showcase: Commander Farsight

I've had some time this week to paint while I wait for classes to pick up steam, so I thought I'd start with touching up the army leader. Highlighting on the red armour sections is completed and I've done a bit of the blue glowing areas. His Dawn Blade has been redone to match the rest of the army better as well.

Sunday, September 6, 2009

Moving

Well, the time has come to head off to university. From now on, I'll be participating in my own games and having my own battle reports posted, so for those of you who have wandered over from Path of the Exodite, you'll be seeing a mostly new crowd from now on...at least until this winter.

For now, Swords of the Vior'la will be silent until I have settled in enough to get a few games going.

Thank you for tuning in thus far!

Apollo

Battle for Forai Gate: Turn 4, Conclusion

Defenders Turn 4

Movement

With time almost up, our options were stretched thin. The Eldar Jetbikers sped away from the enemy in the hopes that they would be able to use their Strategic Redeployment asset to rush at the last moment. For this, we would need the game to move very fast. Our movement phase was limited to that which would allow us to destroy the enemy special characters in one massive blast of doom. The Tigershark finally advanced onto the table, and just in time to grab Razgob in its sights.

Shooting

Our shots consisted of any and all AP 2 and 1 weapons, as well as Destroyer strength shots firing on Razgob. In a combination play from the Pylon and Tigershark, Razgob was wiped off the table. The remainder of the Tau weaponry focused itself upon the Carnifexes, taking down one of those assaulting Forai Gate.

Assault

The Seer Council engaged Varlak, managing to take another wound off of the heretic, but was unable to finish him. The combat remained locked, as both sides awaited the result.

Attackers Turn 4


Movement

In a bid to make Strategic Redeployment work, the Eldar had left another tunnel abandoned, and the enemy poured into the city next to the Power Node. Time ticked down to a close, and with 5 minutes remaining, the Power Node being contested, Forai Gate held by neither side and the Outpost taken by the Orks, both sides agreed to let the battle be decided by the lives of the special characters.

Shooting

Da (the) Vulcha, being the only thing in range of either of our special characters, elected to attempt to destroy the Valkyrie in which Commander Braxton was in. Firing both Destroyer bombs at its target, the scatter dice decided that Braxton would live to fight again. Both bombs completely missed the target.

Assault

The Seer Council made up its points value in an instant as it caused 11 wounds upon the heretic Varlak. Failing his last armour save, Varlak was slain in battle.

Conclusion

As the final turn ended, the Defending Forces had slain Warboss Razgob and Heretic Varlak, while the Attacking Forces had held the Outpost. Both Commander Braxton and Inquisitor Fortez survived the battle. The Power Node was contested by both sides. Forai Gate was held by neither Force.

Final Score: Defenders 2, Attackers 1

Battle for Forai Gate: Turn 3

This is the turn where the Tau proved just how deadly they could be.

Defenders Turn 3

Movement

First of all, the Necron Destroyer Lord returned to life, passing his "We'll Be Back!" roll. The Monolith appeared in the City Square, imposing its hulk upon the Terminators. The Seer Counsil moved towards the other unit deeper in the city. The Pylon appeared at the city gates.

The last Gun Drone squadron Deep Striked in to counter the newly arrived Orks. When the Tigershark flew in, a Long Range Ack-Ack Strategic Asset forced it to disenguage. Kroot units outflanked on both sides, attempting to buy more time for us before the Orks reached the walls again. In a sneaky bid, the Necron Lord used Veil of Darkness to jump in with the Gun Drones and attack the Ork front lines, leaving onf the the tunnels undefended.

Shooting

Of course, one side of the field was rendered moot when in all its glory, the Exuchor destroyed the Ork units on the right side of the table. ...It also hit the Kroot. Both units went to ground to attempt to lessen the damage. The Broadsides unleashed their weapons on the Stompa and managed to breach its last structure point, destroying it. Shadowsun and the Stealth Teams used their deadly Fusion Blasters to destroy the Battlewagon and the Dreadnaught on the left side. The Fire Warriors turned around on the wall to see the Terminators right below them, and after teaming up with the Monolith, destroyed the entire squad. The Seer Council used their Destructors to annihalate the other team.

The Gun Drones and Necrons attempt to deal a fatal blow to Razgob, but their shots cannot breach his mega armour.

Assault

Oh sweet blasphemy, the Tau are assaulting. The Kroot on the deep left side of the board engage the Ork Boyz and route them completely, losing only 3 of their numbers.

Farsight charged in and engaged the Gargant, and using the Dawn Blade, pierced its armour and dealt the final blow to it. Wrecked, the Gargant was permanently removed from the board.


Farsight in victory over the massive Ork war machine

The Tau, having personally wrecked 2 Super Heavies, 2 vehicles, 1 Terminator squad and a unit of Boyz, felt pretty good at this point in the battle.

Attackers Turn 3

It is at this point I have realized the Commander Braxton is not on the table. After pondering this question for a minute, I note the Imperial Valkyrie speeding out of the city gate. ...Clever girl....

Movement

AHHHH the enemy comes pouring through the undefended tunnel! Orks, Tyranids and...IS THAT HERATIC VARLAK?! Carnifexes begin to Mythic Assault around the city, but due to extraordinary luck, one unit mishaps and kills itself. The Hive Tyrant mishaps as well and is returned to reserves. With both sides out of reserves save for the Orks, the battle has reached the climax.

Shooting

SURPRISE! Poor Varlak gets AMBUSHed as he enters the city, and all of his unit is destroyed. The strategic assets of the Eldar are continuing to be useful.

The Necron Warriors get a face full of Kill Cannon from the returned Battlewagon, killing nearly the entire unit. Da Vulcha drops its bombs and rockets again, killing one of my Fire Warrior units and damaging the Scorpion. Carnifexes attack our forces within and outside the gate, and one of my Crisis Teams are down. The Kroot become swarmed my Orks and are wiped out entirely.

In the depths of the city, the Orks and Tyranids fire upon the Eldar Jetbikes, dealing tremendous damage.

Assault


Snickrot assaults the lost of the Kroot, killing them. Is it me, or does it seem like we are the only ones doing the assaulting? It should really be the other way.

With time in our game day almost up, the next turn will be the decider in the battle. Currently Our forces have control over the Power Node and Forai Gate, whist the Ork mob has control of the Outpost. Neither side has killed any of the special characters (Commander Braxton and Inquisitor Fortez, and Warboss Razgob and Heretic Varlak).

Battle for Forai Gate: Turn 2

Defenders Turn 2

The Eldar make use of one of their many strategic assets thanks to the battle formations they selected. With Careful Planning in effect, the entirety of the Eldar forces come onto the battlefield. Because of the special scenario rules, the Eldar all Deep Strike into the battlefield. The Revenant Titan, Aspect Warriors and the deadly Seer Council all position themselves to strike.
My Tau forces activate the Farstrike Battle formation and arrive at Forai Gate as well. The Broadsides take position on top of the gate, while the Crisis teams are mere inches away from the Ork hordes.

Movement

Farsight and Shadosun advance upon the enemy on their respective sides. Everyone else stays put, either because they are guarding a tunnel or they have just arrived on the scene.

Shooting

The Crisis Suits make their points worth up immediately, destroying 2 full units of Boyz with their Flamers. The Fire Dragons open fire on the Gargant, dealing more punishment to the behemoth. The SCorpion fired on the Warhound Titan, and all manner of hell broke loose.

The Reactor on the Titan went nuclear. a devastating 22" blast went out, destroying almost the entire Ork mob. The blast came centimeters short of my own Crisis Suits, but the Eldar lost a Wave Serpent, the Avatar and nearly the Revenent Titan. The Ork Warboss Razgob (an killing objective this game for us) nearly bought it but was saved by his invulnerable save. The Stompa next to him suffered 3 structure points of damage and was otherwise utterly wrecked.

Shadowsun's Stealth contingeant disabled the Ork Battlewagon with the help of the Pathfinders Markerlights. The Broadsides managed to pick off the Chaos Defiler with their Rail Guns.

Assault

Farsight, along with the Deceiver, charged a group of Defkopters, destroying them utterly. The Fire Dragons engaged the Gargant, and with an impressive display of meltabombs, decimated all but one of the Gargant's structure points.

Attackers Turn 2

Movement

With all their equipment either obliterated or disabled, the Orks simply returned to the battlefield this turn. Coming out of the skies was the terrible Ork Vulcha, a heavy bomber with destroyer strength bombs! Also deep striking in were two units of Chaos Terminators and some outflanking Genestealers.

Shooting

The Terminators opened fire and killed the Necron Destroyer Lord who had occupied the Chaos Warp Rift. The Gargant unleashed what weapons it retained on the walls, and Fortez had to duck once again. Neither side was proceeding in objectives so far. The Stompa opened fire with it's Supa Gattla and killed the Necron Deceiver. Farsight's unit was also hit but managed to dodge or deflect most of the bullets.

There would be great vengeance for this.

Da (the) Vulcha dropped its bombs and fired its rockets, damaging the Cobra, destroying a Fire Prism and destroying one of my Hammerhead Rail Guns :'(

Assault

With one structure point left, the Gargant dared not go against the Fire Dragons in combat once more. The Assault Phase was unused.

Farsight was seeing red after this turn, with the Gargant within his sights.

Thursday, September 3, 2009

Battle for Forai Gate: Turn 1

The game begins and our Necron ally announces the pressence of a Vortex Grenade. The Chaos Forces not only open up their warp rift, they also create 9 tunnels within the city walls!

Defenders Turn 1


Movement

The Forai Gate opens up to the enemy, revealing our potent tank formation. On the left side, Shadowsun, the Stealth Teams, Fire Warriors and the Pathfinders face a Battlewagon, Chaos Deadnaught and a Defiler. On the right, Farsight and his bodyguards, and also two teams of Gun Drones stare down the massive Gargant alongside Inquisitor Fortez and his Guard. The majority of our forces move out amongst the city to guard the tunnels and the Warp Rift.

Shooting

The Tau Strategic Asset shows it's face as nearly every enemy unit is suddenly hit by a markerlight.

The Cobra unleashes hell upon the Gargant, attempting to suck it into the warp. Superficial damage is caused, along with a broken weapon. The Fire Dragons rush forward and fire with their melta weapons. A bit more damage is caused, but otherwise, the Gargant is still an imposing pressence. The Gun Drones manage to strike the Orks guarding the Gargant and nearly wipe them out.
On the other side of the walls, Shadowsun and the Stealth teams fire Fusion Blasters at the Battlewagon, but fail to breach it's armour. The Pathfinders use their Markerlights to rain down Seeker Missiles upon it, shaking the crew enough to render it useless next turn. In the middle of the battlefield, the gate defense guns fire at the Warhound Titan, breaking down the void shielding. Both Hammerheads and the Eldar Scorpion open fire and--thanks to markerlight guidance--deal 2 structure points of damage, rendering the titan inopperative. for the following turn.

Assault

The Stealth teams, Farsight and Shadowsun use their jump moves to edge ever closer to the enemy.

Attackers Turn 1


Movement

To say the least, a huge mob advanced closer to the gates, less than a tile (24") away from our defences. The Gargant Tank Shocked the Fire Dragons in front of it, but the Exarch went for Death or Glory and stunned the driver of the Gargant, halting it in it's massive tracks. Deffkopters flew in towards either tower of the gate, preparing to launch a massive assault.

Shooting

The Orks ran further up the field as Razgob stood watching his Waaargh. The Gargant unleashed its potent arsenal upon the Fire Dragons, destroying the unit. Fortez had to duck to avoid the fire on the Right wall sections. Thankfully, Orks have little shooting to do, being Orks. :)

Assault

No Assaults this turn. We sit and wait for our impending doom. Akenseth believes us to be overrun by Orks next turn. I have other plans.

The Orks are right in front of Forai Gate as we begin Turn 2. ...Perfect.

Wednesday, September 2, 2009

Prepare for APOCALYPSE!

All right, this is the big one! The Tau are fighting for the Imperium with the Eldar and Necrons. There are over 20,000 pts per side and it's going to be nasty evil bad!


The Attackers


...and the Defenders

Oh, what's that giant thing over on the right side of the Attacker's deployment?


Meet the GARGANT, 2200 pts of Ork squishiness. Not gonna lie, this thing is really scary. Perhaps I'll feel better if I look at what my own army is packing?

THE SWORDS OF VIOR'LA BATTLE FORCE


HQ
Commander Farsight
Bodyguard w/Cyclic Ion Blaser, Plasma Rifle, Shield Gen, H/W Multitracker
Bodyguard w/Fragmentation Launcher, Fusion Blaster, Shield Gen, H/W Multitracker
Commander Shadowsun

Elite
Stealth Team (3) (1 Fusion, Marker Drone, 2 Targetting Arrays)

Troops
Fire Warrior Team (12) w/Shas'ui w/markerlight & multitracker
Kroot Carnivore Squad (12) w/2 Hounds OUTFLANKING
Kroot Carnivore Squad (12) OUTFLANKING

Fast Attack
Pirahna Squad (3) w/3 Fusion, Sensor Spines, Targetting Arrays, Flechette Dischargers, 6 Seeker Missiles
Gun Drone Squad (8)
Gun Drone Squad (8)
Gun Drone Squad (8) DEEP STRIKING
Pathfinders (8) & Devilfish (SMS, 2 Seekers, Sensor Spines)

Heavy Support
Hammerhead w/Railgun, SMS, Sensor Spines, Multitracker, Disruption Pod, Flechette Dischargers, 2 seeker missiles

Formations
Farstrike Battlesuit Formation - Arriving at Forai Gate on turn 2
Crisis Team x3 (all armed with flamers, and each suit in the unit carrying either a burst cannon, missile pod or plasma rifle)
Broadside Team x1 (Adv Stabilization Systems)

Legendaries

AX-0-1 Tigershark w/6 seeker missiles

My Strategic Asset for this battle is the Remote Drone Network, which allows me to mark of a 48" diameter on the board each turn, getting a free markerlight hit on all units in range. See why I have the missiles now? >:)

Both sides have elected to take jammers via one of the players, so deployment was carried out in erie silence. This battle is about to explode, so stay tuned for the weapons to start flying!

Tuesday, September 1, 2009

Showcase: Army

Today's the big Apoc match, so I decided to post some pictures of the army. This is incomplete as the Crisis Suits I've recently built aren't in these pictures. I'll be posting more pictures between now and when the battle report comes, so be sure to check it out.


Monday, August 31, 2009

Upcoming Apocalypse Battle: Forai Gate

*gulp* This is the gigantic Apocalypse game we're about to play. Both sides are gearing up for a long day of gaming, and I'm no exception...only I haven't a clue which side I'll be fighting for yet! Confusion ensues as I try to come up with tactics for both sides of this chaotic battle.

Check out the video for an extended take on the pre-battle.


Expect the battle report to arrive later this week due to editting time. Until then, expect me to post some pictures of the army throughout the week.

Swords of the Vior'la - Introduction

"Vior'la. A sept long divorced from the main ruling of the Tau Empire. Their hot heads and quick tempers set them apart from their brothers, prefering direct combat to the ranged tactica of the rest of their race. The Vior'la sept now sits at the fringe of the Empire's space, led by Shas'O Shovah, Commander Farsight, as he battles Orks, Imperials and xenos alike with his formidable Dawn Blade."

Welcome to Swords of the Vior'la, a blog dedicated to the exploits of my Farsight-themed army. If you've been to pathoftheexodite.blogspot.com before, you've already had some glimpses of my army in action, but now it's been given a rehaul for the better. Here you'll see battle reports centered around a mechanized/hybrid Tau army, experimental aggressive tactica and model construction tips Battlesuits and various other Tau models.

Alot of my army is themed off of the Vior'la Sept and Commander Farsight. I carry a vast number of Battlesuits in my army and plan to give Farsight's 8-man unit a fielding in some upcoming battles. This is the eight Swords of the Vior'la. I do, however, have other units such as Commander Shadowsun and Kroot Carnivore Squads which I do enjoy using when I haven't brought O'Shovah along. All my forces come together for Apocalypse (bless the disregarded force organization chart) to bring about a force of reckonning.

As luck would have it, we're about to have gigantic Apocalypse battle this Tuesday (that's tomorrow!) with our 40k group here, so stay tuned for a preview take on that from me and be sure to check out the advanced details on Akenseth's blog, and be sure to check in for showcases of the Vior'la Sept's forces.

The Greater Good will not corrupt us!

We are the Swords of the Vior'la!

Blogger template 'WateryWall' by Ourblogtemplates.com 2008